In this post I’ll walk through how I deployed the Domain Controller and Config Manager components of the Windows Hydration Kit to my homelab Proxmox server.
Everything in this guide comes directly from Johan Arwidmark’s original work and all credit should go to him. I have simply rearranged some of his guide’s steps so they made more chronological sense and were more applicable to my environment. If you’re new to the Windows Hydration Kit, you should definitely start by visiting Johan’s website and looking at his expansive training material.
Table of Contents
Open Table of Contents
Networking
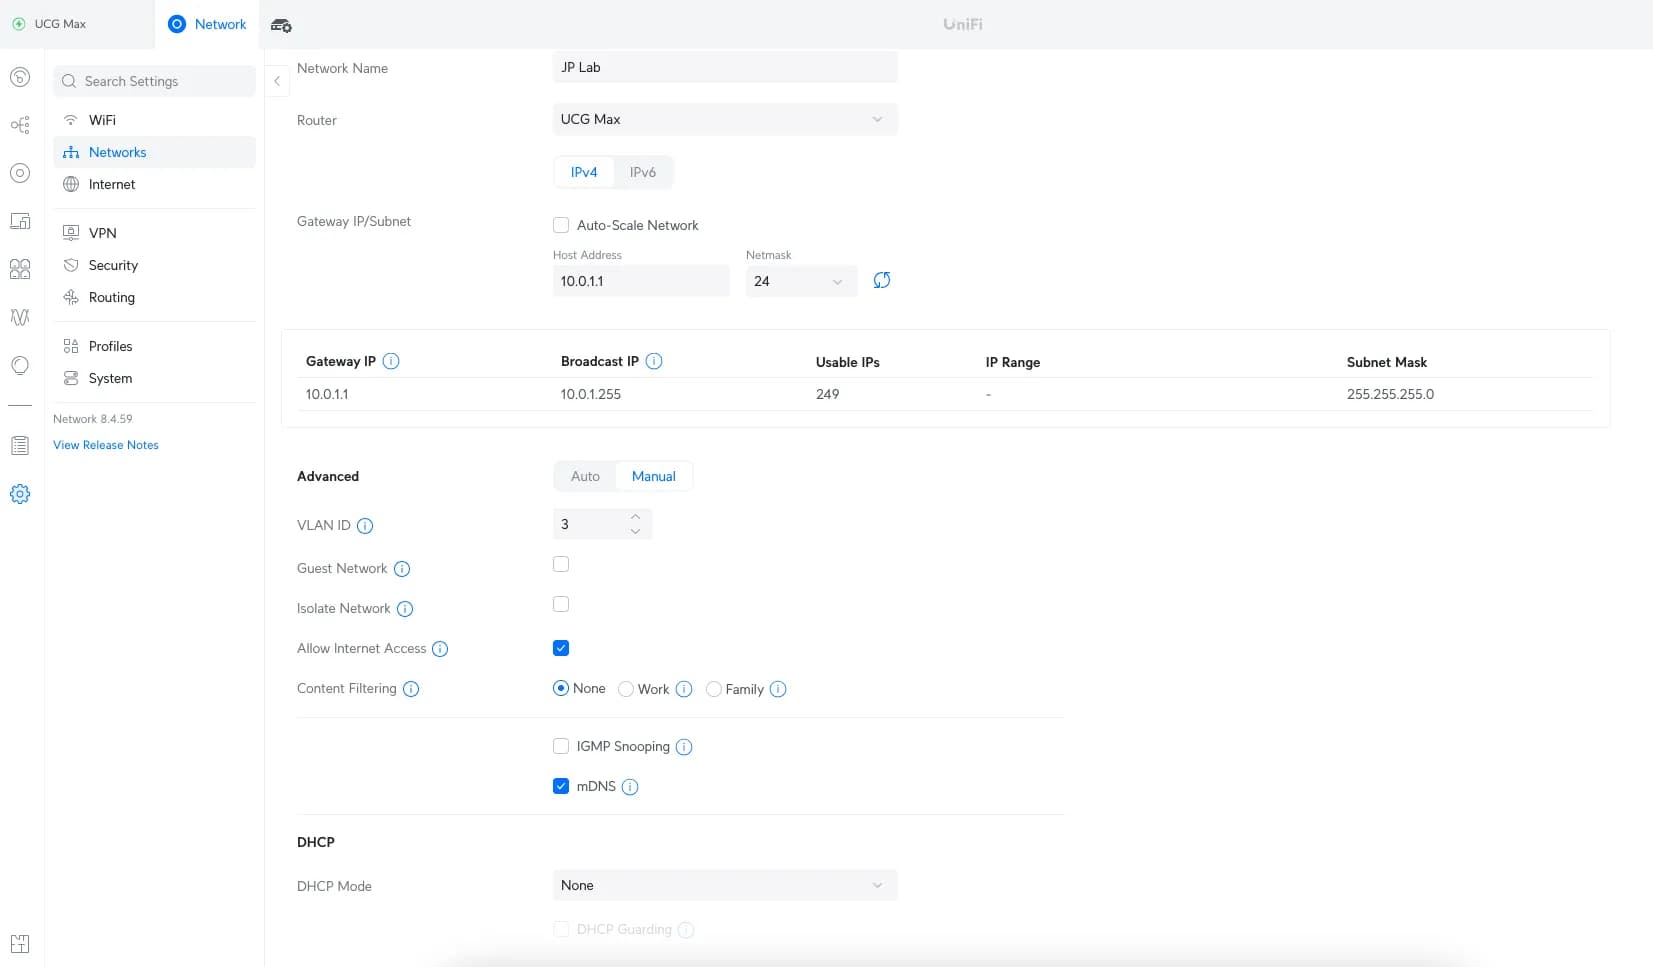
Creating a New VLAN
I’ve opted to create a new VLAN for my Windows Lab since I want DHCP and DNS to be handled by the Windows Server created by the Hydration Kit. I’ve got a UniFi Router in my HomeLab so configuring this is a breeze.
Name: JP Lab
VLAN ID: 3
Gateway IP/Subnet: 10.0.1.1/24
DHCP Mode: Off
Host Setup
My primary Hypervisor is an old Dell Optiplex 7070 I picked up off ebay for cheap that I loaded with 64 gigs of RAM and a 4TB SSD.
This machine is running Proxmox so I could just deploy the Hydration Kit VMs directly as Proxmox VMs but where’s the fun in that?
Instead, I’m going to create a single Windows Server 2022 Proxmox VM and then run Hyper-V on that Server to host the Hydration Kit VMs. This is called Nested Virutalization. Nested Virtualization is typically frowned upon for a production scenario but this is my home lab environment so who’s going to stop me!? >:)
Primary Host Setup (Windows Server 2022 Data Center)
Creating the VM in Proxmox
Specifications
OS: Windows Server 2022 Data Center
Disk: 1000GB
RAM: 32 GB
CPU: 8 Cores (My Optiplex 7070 has an Intel i7-9700)
Simply create the new VM in Proxmox as you normally would with the following special considerations:
- Change the GUEST OS type to Microsoft Windows
- Mount your Windows Server installation ISO
- Add additional drive for VirtIO drivers and download/select the virtio-win-0.1.262.iso (this was the version at the time of writing)
- Add the required EFI Storage and TPM Storage to make Windows Happy :)
- Change the Hard Disk to use SATA instead of SCSI
- Change the CPU type to Host. I haven’t been able to get nested virtualization to work with any other CPU type selected
- Ensure the network VLAN tag is set to your VLAN (mine is VLAN ID 3)

Installing Windows
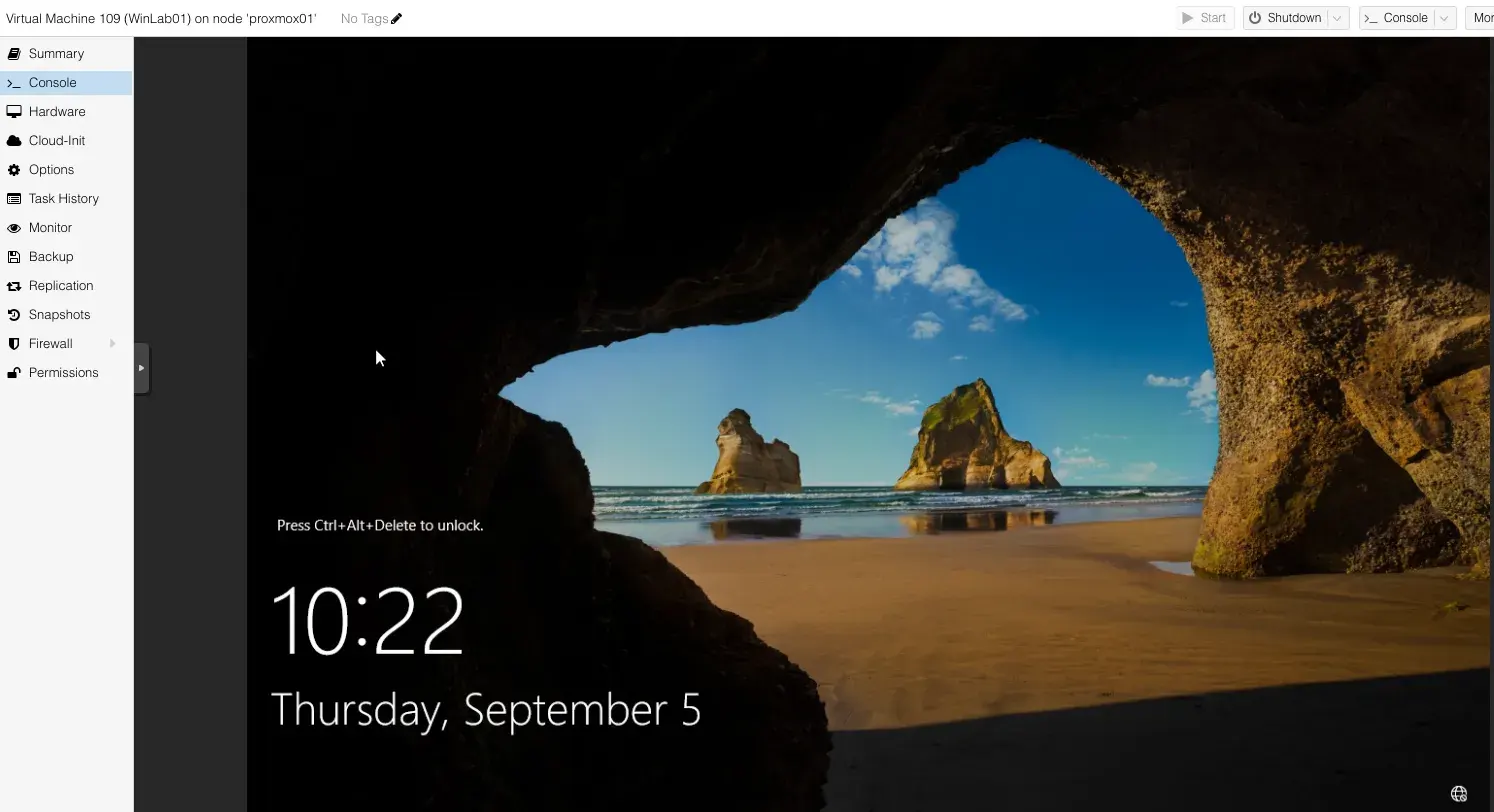
With the VM Created and the Windows Server ISO mounted, I simply started the VM and walked through the Windows installation process.
- Ensure you select Windows Server 2022 Datacenter (Desktop Experience)
- Once the install is complete, give the default administrative account a strong password
Post Install Configuration
With Windows installed, there’s a few things we need to configure before we can start working on the Hydration Kit
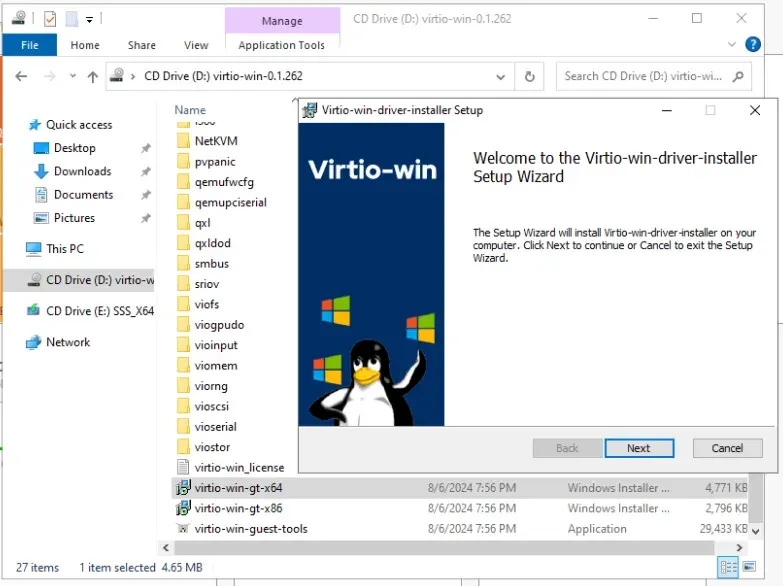
- Install the VirtIO Windows Drivers (The ISO should already be mounted since you configured that in the Proxmox setup)
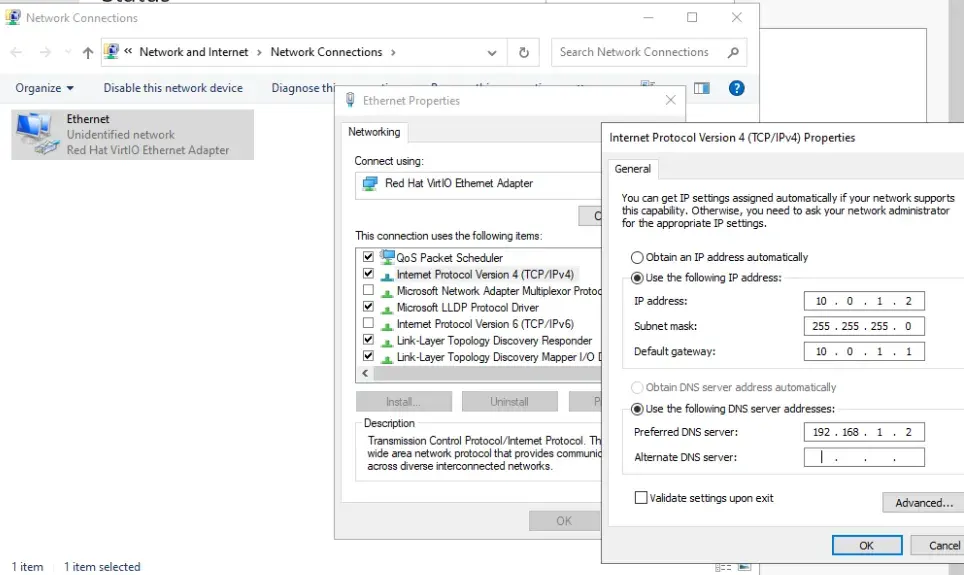
- Change your network adapter settings so you can get an internet connection. I’m using the new VLAN I set up earlier since I plan to bind the Hyper-V virtual switch directly to this VMs NIC
- Install windows updates… There are always a ton after you install a new OS
- Rename the VM in Windows Settings
- Adjust timezone on VM as needed by opening an administrative command prompt and running
control timedate.cpl - Create a New Local Admin so we can stop logging in with the default Administrator user
- Enable Hyper-V from the Server Manager Add Roles and Features Wizard. Don’t add a virtual switch at this point. We’ll do that later.
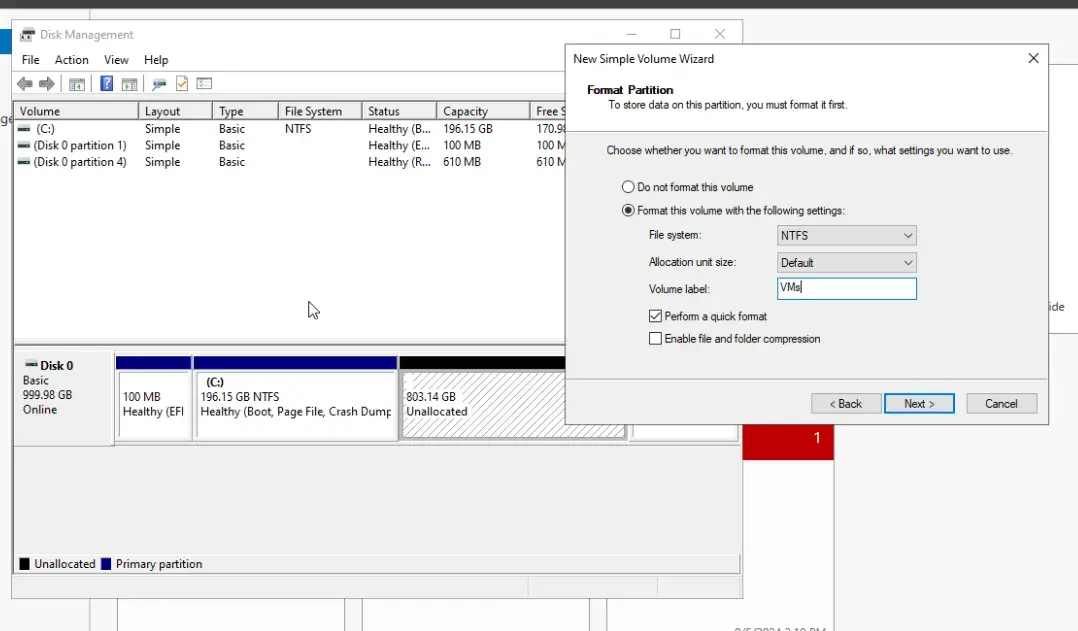
- To keep things tidy, I also shrank my OS partition to 200 GB and then created a new partition I named VMs to use for the Hyper-V VMs
Hydration Kit Setup
Obviously, using the Hydration Kit to create a Windows Home Lab requires access to installation media and it goes without saying that using or distributing Microsoft binaries without permission would be against the law.
So for that reason, and for brevity, I will only mention what things need to be downloaded/installed and will not provide direct links (even to the free stuff) because those links are bound to change and the awesome creators of the Hydration Kit have already comprised a list containing said links here.
Lastly, all of these things need to be downloaded and installed onto the new Windows VM that you enabled Hyper-V on. AKA Not your local machine and not the Proxmox host.
Installing the Hydration Kit and its Prerequisites
Hydration Kit Prerequisites
- Download and install the Windows 11 ADK
- Download and install the Windows PE add-on for the Windows ADK
- Download and install MDT 8456
- Download the MDT 8456 HotFix and extract it to somewhere like your downloads folder. After extracting it, you will have x64 and x86 folders
- Copy and Paste the .dll file from the x64 folder to
C:\Program Files\Microsoft Deployment Toolkit\Templates\Distribution\Tools\x64and replace the file - Copy and Paste the .dll file from the x86 folder to
C:\Program Files\Microsoft Deployment Toolkit\Templates\Distribution\Tools\x86and replace the file
- Copy and Paste the .dll file from the x64 folder to
- Create a new folder at the root of the C: drive named Setup. Inside of Setup, create another folder called HydrationKit
- Install Visual C++ 2017 from https://aka.ms/vs/15/release/vc_redist.x64.exe
Installing the Hydration Kit
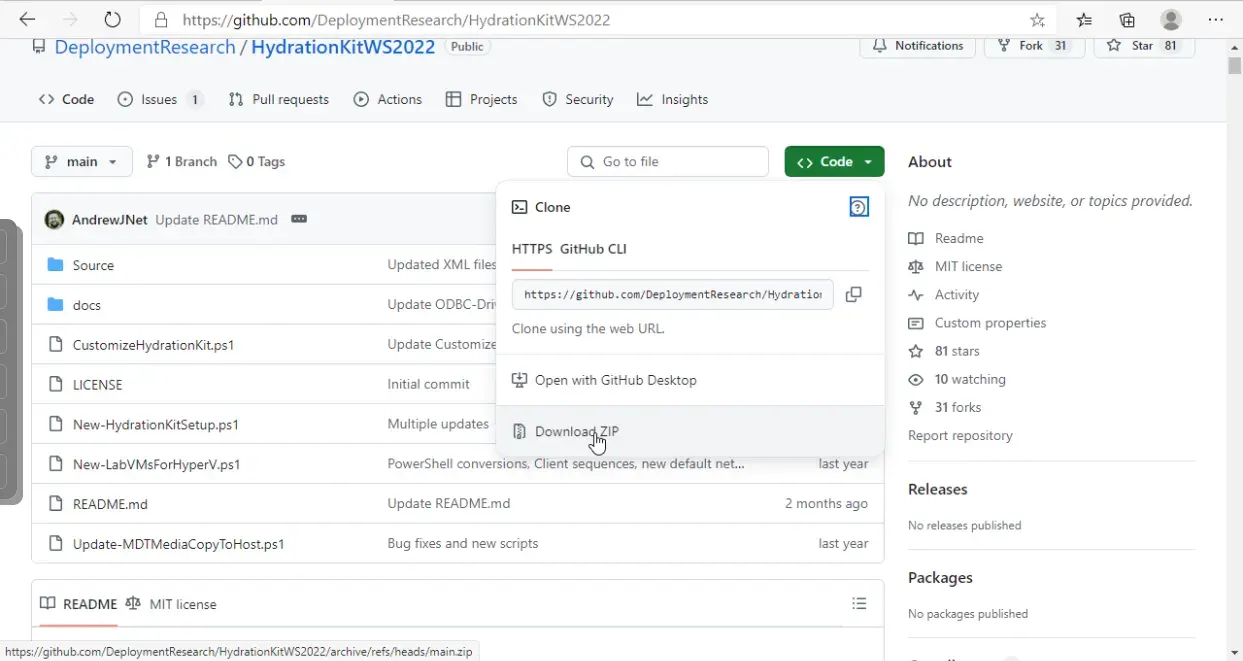
- Go to https://github.com/DeploymentResearch/HydrationKitWS2022 and download the repository as a zip file.
- Extract the contents of the zip file to the folder you created in the previous step.
C:\Setup\HydrationKit - Open an administrative PowerShell Window and
cdtoC:\Setup\HydrationKitand then run:
The output should look similar to the following:Powershell.exe -ExecutionPolicy bypass -f .\New-HydrationKitSetup.ps1 -Path C:\JPLab -ShareName JPLab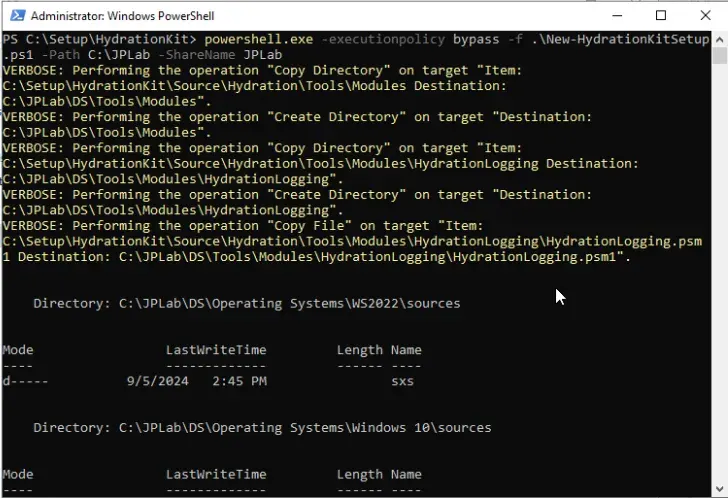
Acquiring Installation Media Required to Run the Hydration Kit
Windows Server 2022 Reference Image
- Extract the Windows Server 2022 Standard (Desktop Experience) WIM file from your Windows Server 2022 Installation ISO using this script
- Move the generated WIM file to
C:\JPLab\DS\Operating Systems\WS2022 - Temporarily Mount Your Windows Server 2022 Installation ISO in order to copy the file located at
YOURDRIVELETTER:\sources\sxs\microsoft-windows-netfx3-ondemand-package~31bf3856ad364e35~amd64~~.cab - Copy the cab file into
C:\JPLab\DS\Operating Systems\WS2022\sources
ADK Setup Files
- Rerun the adksetup.exe file you downloaded earlier as part of the prerequisites for installing the Hydration Kit
- Select Download and then choose any old path such as your downloads folder
- Once the files are downloaded browse to the location and copy the Installers folder, adksetup, and UserExperienceManifest files
- Paste these files into
C:\JPLab\DS\Applications\Install – Windows ADK 11\Source
ADK WinPE Add-on Setup Files
- Rerun the adkwinpesetup.exe file you downloaded earlier as part of the prerequisites for installing the Hydration Kit
- Select Download and then choose any old path such as your downloads folder
- Once the files are downloaded browse to the location and copy the Installers folder, adkwinpesetup, and UserExperienceManifest files
- Paste these files into
C:\JPLab\DS\Applications\Install – Windows ADK 11 WinPE Addon\Source
SQL Server 2019 Standard
- Mount the ISO for SQL Server 2019 Standard and copy the contents to
C:\JPLab\DS\Applications\Install – SQL Server 2019\Source
SQL Server 2019 Cumulative Update
- Download the latest Cumulative update for SQL Server 2019 (this is a free download)
- Copy the exe file to
C:\JPLab\DS\Applications\Install - SQL Server 2019 Standard\Source\Updates- You’ll have to create the Updates folder yourself
SQL Server 2019 Reporting Service
- Download the latest SQL Server 2019 Reporting Services executable (also free) and copy it to
C:\JPLab\DS\Applications\Install - SQL Server 2019 Reporting Services\Source
Microsoft ODBC Driver 18 for SQL Server (x64)
- Download the latest Microsoft ODBC Driver 18 for SQL Server (x64) executable and copy it to
C:\JPLab\DS\Applications\Install - Microsoft ODBC Driver 18 - Run the executable to install the ODBC driver on the Windows Server since this is needed for a future step
In order to install the ODBC driver you may also need to install the Visual C++ Redistributable. This can be obtained for free and a quick google search should help you find it.
ConfigMgr 2403
- Download ConfigMgr 2403 from Microsoft and then extract the files to your downloads folder
- Copy the extracted contents to
C:\JPLab\DS\Applications\Install - ConfigMgr\Source
ConfigMgr 2403 Prerequisites
- Run
C:\JPLab\DS\Applications\Install - ConfigMgr\Source\SMSSETUP\BIN\X64\setupdl.exe - In the window that asks for a path to download the files to, enter
C:\JPLab\DS\Applications\Install - ConfigMgr\PreReqs
Customize the HydrationKit
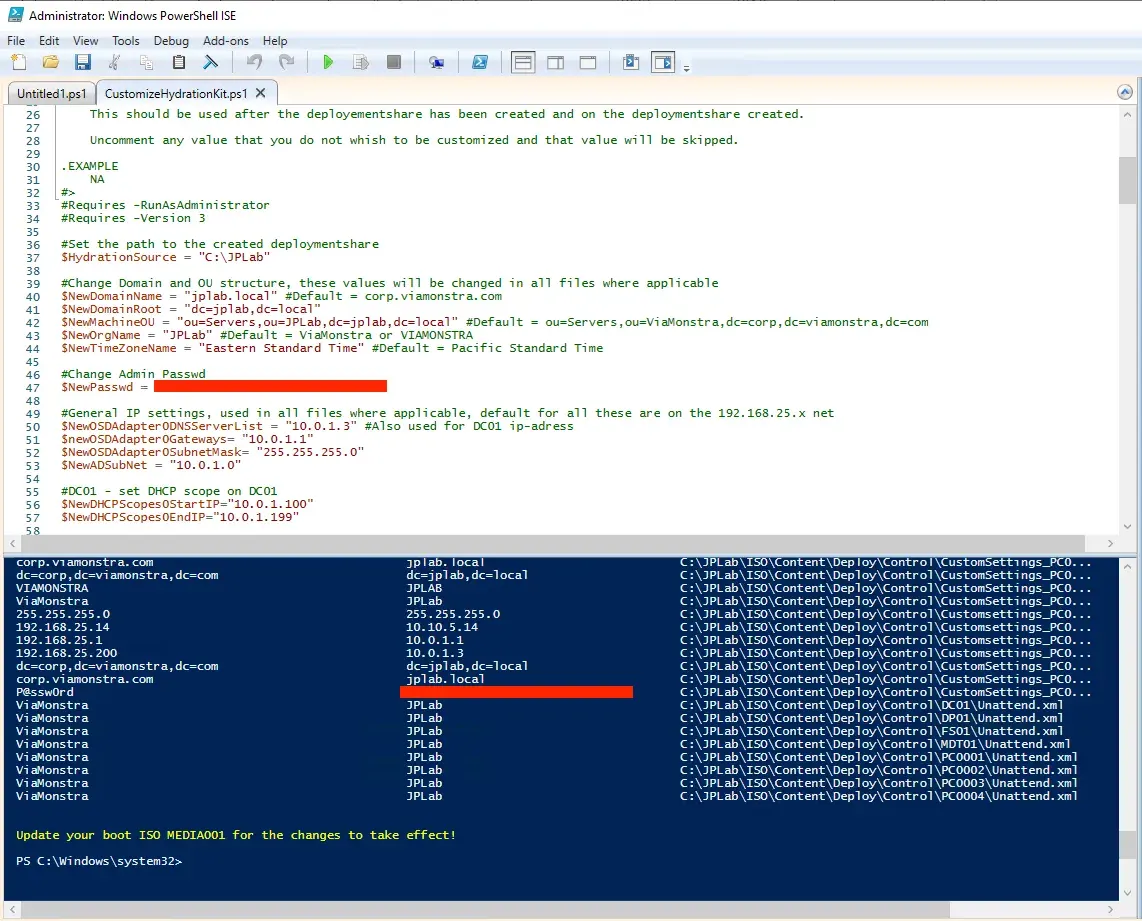
The HydrationKit comes with a handy script CustomizeHyrationKit.ps1 that lets you customize things like domain name, default password and IP settings.
- Open CustomizeHyrationKit.ps1 with an administrative Powershell ISE and edit the values to your liking
- Run the script!
Create the Bootable MDT ISO
- Open DeploymentWorkbench (which was installed when you installed MDT)
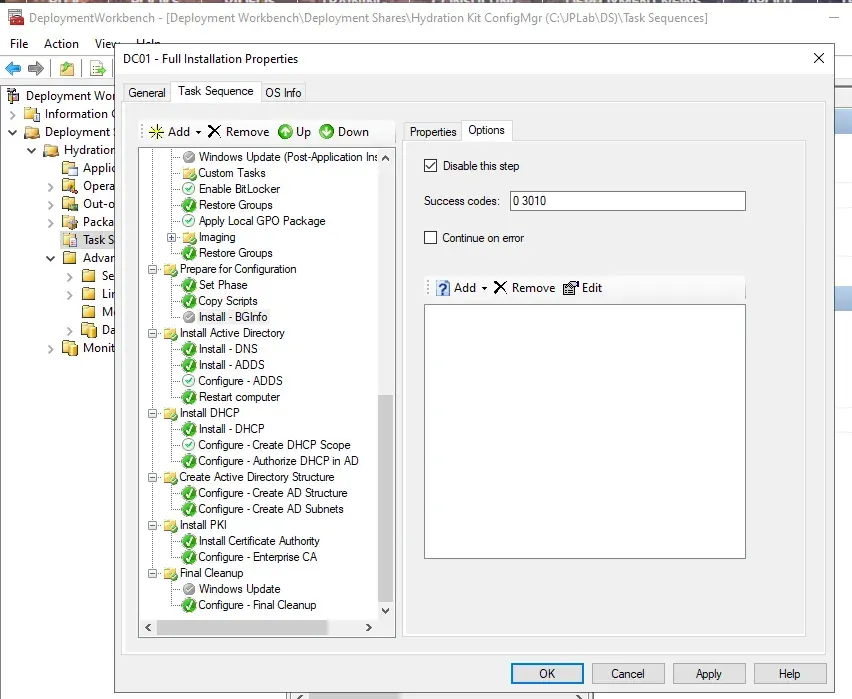
- Disable the Install BGInfo step in the CM01 and DC01 task sequences as we won’t be using it
- Expand Deployment Shares -> Hydration Kit ConfigMgr -> Task Sequences
- Double Click CM01 - Full Installation
- Select the Task Sequence tab
- Find the Install - BGinfo step on the left and select it
- Select the Options tab and then check Disable this step
- Do the same for the DC01 task sequence
- Create the Bootable Iso
- Expand Deployment Shares -> Hydration Kit ConfigMgr -> Advanced Configuration -> Media
- Right click MEDIA0001 and select Update Media Content
- A new progress window will pop up and could take some time (10 minutes for me)
- Once complete you’ll have a new ISO image at
C:\JPLab\ISO\HydrationCMWS2022.iso
Deploying the HydrationKit VMs
The following deployments/configurations will take place in Hyper-V on your Windows Server 2022 host VM
Creating a Virtual Switch
- Right click the Host in Hyper-V manager and select Virtual Switch Manager
- Select External and then Create Virtual Switch
- Ensure the External Network is set to the VirtIO Ethernet adapter and that Allow Management OS to share this network adapter is checked. Click Ok
- Windows will create a new network adapter at this point. If you lose internet connectivity, you may have to fiddle around with the adapter ipv4 configuration in the Windows Network Adapter settings. For me, Windows automatically swapped my static IP configuration from the original network adapter to the new one created by Hyper-V so I didn’t have to do anything.
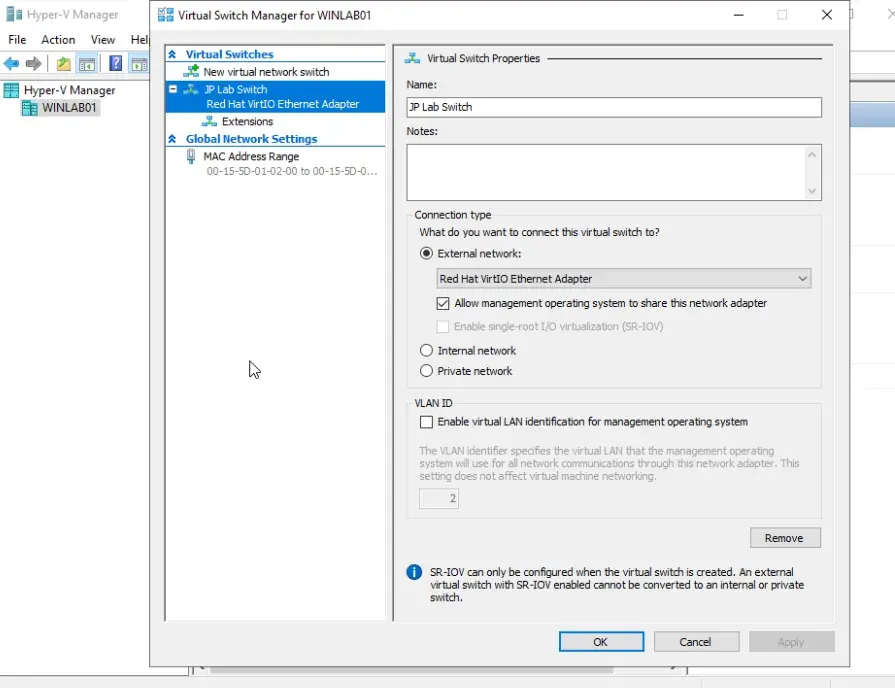
The VLAN ID doesn’t have to be set here because the Virtual Network Adapter this VM is using was already tagged by Proxmox. This means that my Windows Server 2022 Host is going to be on the same network as my JPLab servers.
Deploying the VMs
- For each VM, right click the host in Hyper-V manager and select New -> Virtual Machine…
- Apply the settings for each VM based on the configuration shown in the sections below
- Before booting the VM for the first time, open the settings for each VM and change the following:
- Set Number of virtual processors to 2
- Disable Checkpoints
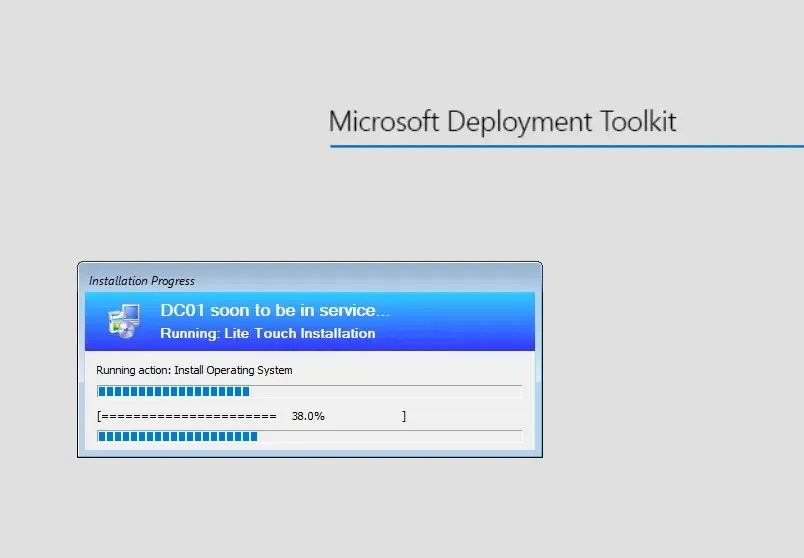
- Boot the VM (might need to spam keyboard to get it to boot from the attached iso) and select the desired task sequence
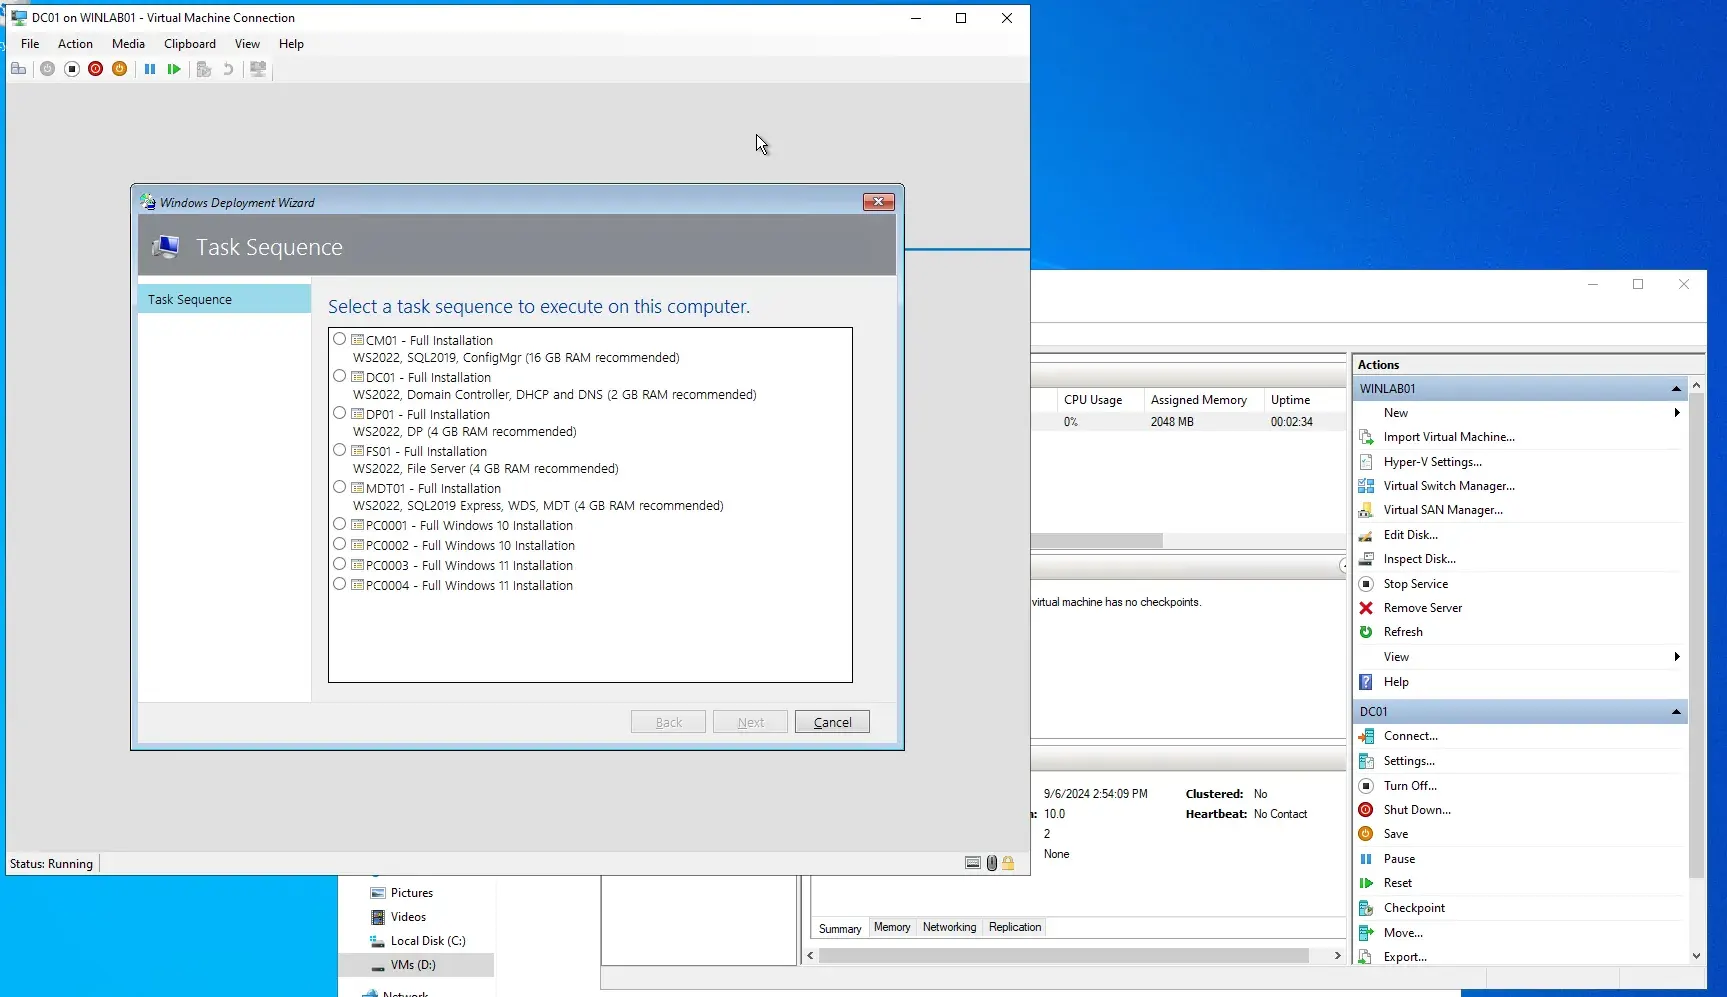
In this guide, I’ve only confiugred CM01 and DC01 to work since that’s all I wanted to use. The other’s won’t work but Johan Arwidmark’s full blog post details what installation binaries are required for the remainder here.
Domain Controller
This VM needs to be installed before CM01.
Name: DC01
Location: D:\VMs
Generation: 2
CPU: 2 vCPU
Memory: 2048 MB (Don’t use Dynamic Memory)
Network: JP Lab Switch
Hard Drive: 100 GB (dynamic disk)
Image file (.iso): C:\JPLab\ISO\HydrationCMWS2022.iso
Config Manager
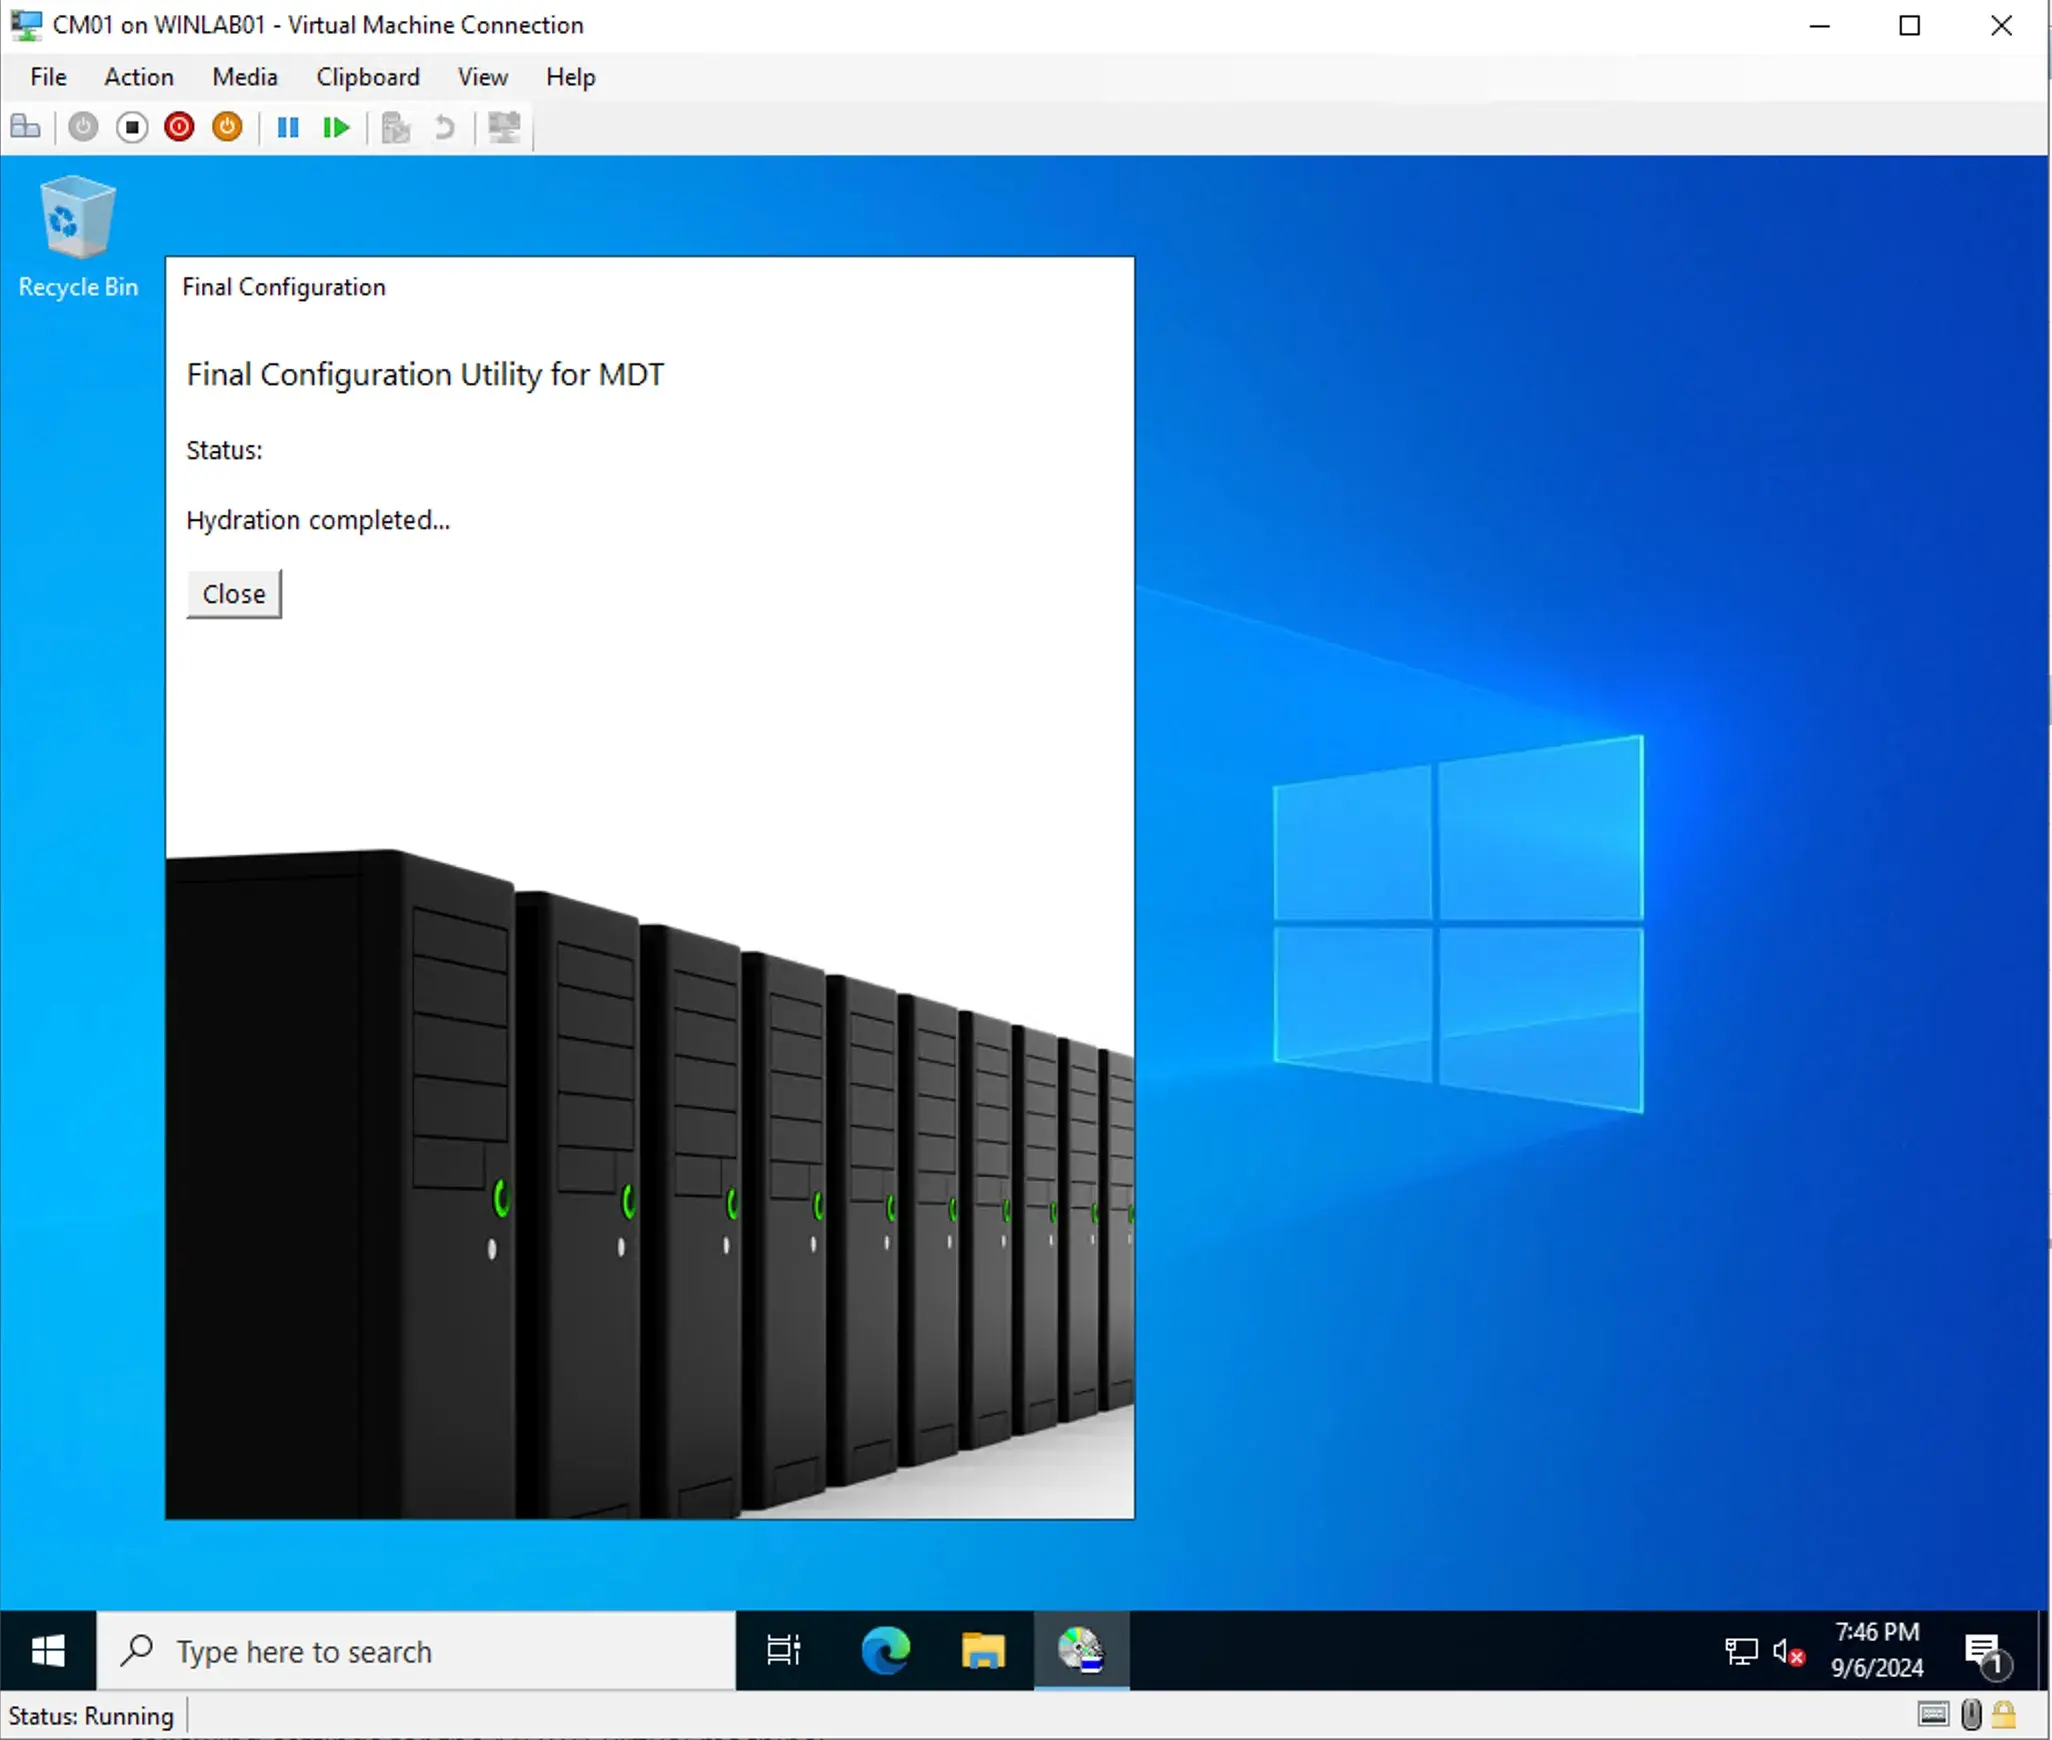
This took nearly an hour to finish provisioning for me. Probably thanks to nested virtualization :)
Name: CM01
Location: D:\VMs
Generation: 2
CPU: 2 vCPU
Memory: 16 GB (Don’t use Dynamic Memory)
Network: JP Lab Switch
Hard Drive: 300 GB (dynamic disk)
Image file (.iso): C:\JPLab\ISO\HydrationCMWS2022.iso
Conclusion
I had a ton of fun setting up this environment and may look to do more blog posts in the future expanding on the lab because there’s something alluring about having an enterprise Windows Environment running in one’s basement :)
Again, big thanks to Johan Arwidmark at https://www.deploymentresearch.com for putting together such a great kit!